To set up Google Sync on your Windows Mobile device, please follow the steps below.
Important Notes:
- Make sure that you have backed up any Contacts and Calendars from your phone to your computer before proceeding.
- Make sure your JLT Axim or iPAQ has an active WiFi connection to the web before proceeding.
- Getting Started
2. Click Set up your device to sync with it.
3. Enter m.google.com as the server address.
4. Ensure that the SSL option is selected.


Sign In to Your Google Account
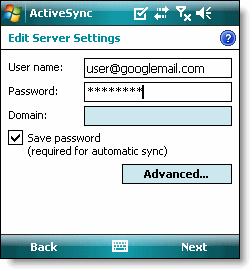
5. Click Next.6. Enter your full Google Account email address as the User name.
7. Enter your Google Account password as the Password. If you're a 2-step verification user, please use an application-specific password instead (if you don't know what this means, then you're not a 2-step verification user and you can ignore this sentence).
8. Leave the Domain field empty. (Not required on the JLT Axims and iPAQs)
9. Click Next.
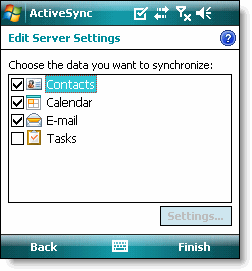
10. Check Contacts and Calendar. (Tasks is not supported and will lead to an error if checked. JLT recommends you not sync email; it's better to just access email through a regular online interface.)
11. Click Finish.


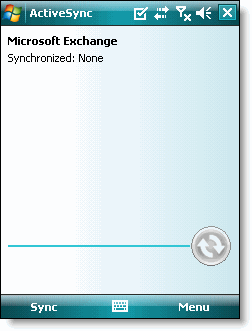
12. Press the Sync softkey on the left to synchronize. The sync set-up isn't registered through Google until you sync for the first time. If you have a lot of appointments or contacts, this might take several minutes.

You've now set up Google Sync for your Windows Mobile device.
Tip: If your business, school, or organization uses Google Apps, your administrator will first need to enable Exchange ActiveSync before you can take advantage of this feature.